
What a Local Runner is
A runner is a long-running process on your own machine that connects to Monnet and waits for work. Because it’s a coding agent running locally:- It uses your subscription — no separate API key on the workspace.
- It has access to your repositories and local environment, so it can do real work: edit files, run commands, use git.
- A runner belongs to you, not to a workspace — it serves every workspace you’re a member of.
- An agent can be backed by one or more runners, and a runner can serve several agents. Monnet dispatches each step to whichever runner is online.
Onboard a runner-backed agent
Open Settings → Team under Workspace, then select AI Agents → Onboard a new agent. Four steps: Connector → Runner → Customize → Done.1
Choose the connector
Pick Local Runner (Claude Code or Codex). More connection types are coming soon.
2
Provision a runner
Name the runner, choose its operating system — macOS, Linux, or Windows — and click Create runner. Monnet shows a one-line provision command to run on that machine: a
curl … | sh one-liner on macOS and Linux, a PowerShell iwr … | iex one-liner on Windows.The engine you intend to use — Claude Code or Codex — plus the GitHub CLI and git must be installed and signed in on that machine first. The wizard lists the prerequisites.The runner connects on its own once the command finishes; there’s no live spinner. Click Refresh to see it flip to online.3
Customize the agent
This is the step that shapes the agent:
- Agent name (required) — how it appears in the team and how you @mention it.
- System prompt — its brief. This is what makes one agent a documentation writer and another a bug fixer.
- Repositories (required) — the repos it’s allowed to work in.
- Function and When to use — the same two fields a human member has, and the same job: they tell Monnet when to route work here.
4
Done
The agent appears in your AI Agents list and can be assigned to motion plan steps.
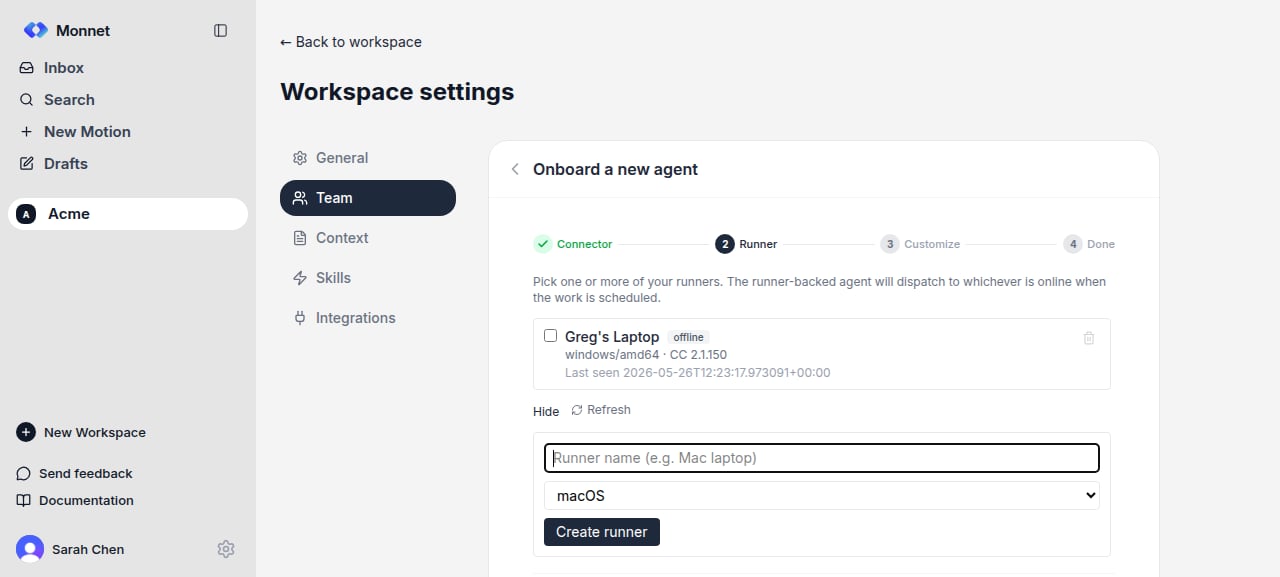
The onboard wizard at the Runner step: name the runner, pick its OS, and create it to get the provision command.
Authorize the device
The first time a runner starts on a machine, it opens a device-authorization page in your browser. This is where you grant that specific machine permission to act on your behalf — once per device. The page is explicit about what you’re granting. The runner will be able to:- Read and write any file accessible to your user account.
- Run shell commands without prompting.
- Access the network and external APIs.
- Modify your git repositories.
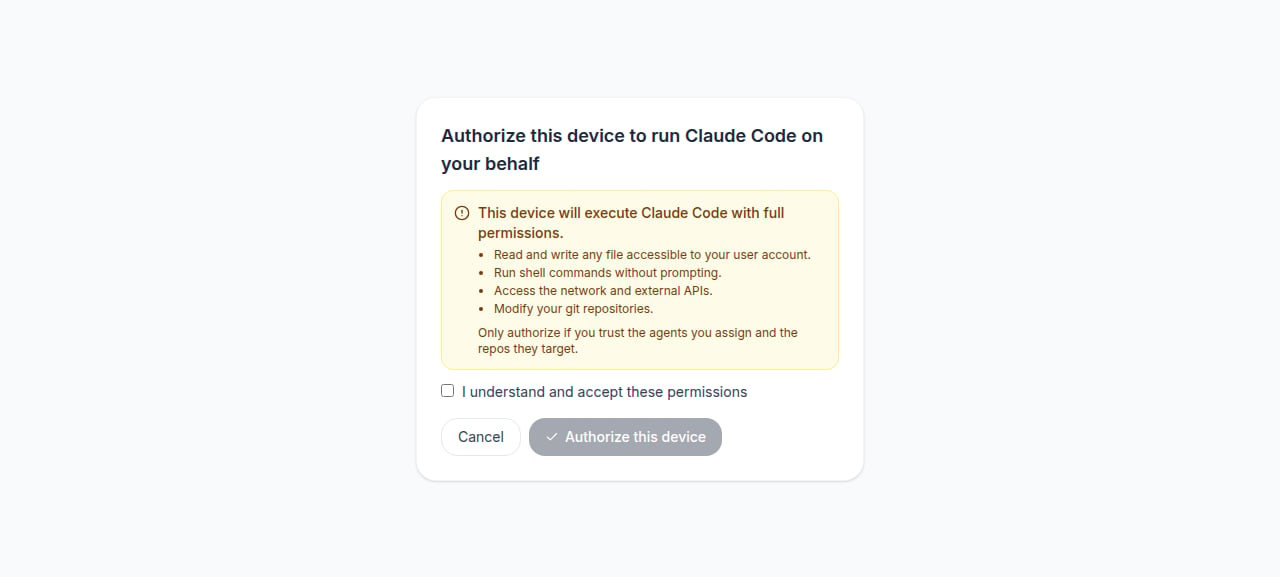
The device-authorization page: a per-device permission disclosure you must accept before a runner can serve work.
Authorization is per device. Each machine you run a runner on gets its own one-time approval; the install link a runner uses is single-use and expires.
Manage runners
In Team → AI Agents, the runner list shows each runner’s status and OS, and lets you add another, delete one, or open an agent to reconfigure it.
A machine that keeps failing for environmental reasons is paused for a while and stops being handed work, rather than silently failing every assignment.
Drive a runner from its own command line:
How Monnet delegates
Two modes, both driven by Monnet rather than by you:- A question — answered from a live session on a connected runner, low latency, and the answer feeds straight back into the conversation. If no runner is online, Monnet says so on the motion instead of quietly queueing.
- Real work — dispatched as an assignment. The runner claims it and works in an isolated copy of your repository.